Mahogany T Style Build part 5


Then onto wiring in the pickups. First problem was the hole into the control cavity was too small for the cables to all fit through. Luckily I bought some very long wood drills for this type of problem. I was able to work up through the sizes to get it large enough.
Then to soldering. Not my favourite exercise and I think I'm rubbish at it. Still after some deep breaths going a step at a time I got there plugged in for a tap test and blow me down. It all worked properly first time!

On with assembly.

Ferrules inserted. Defo prefer these "vintage style" much neater to cover any little tear out.

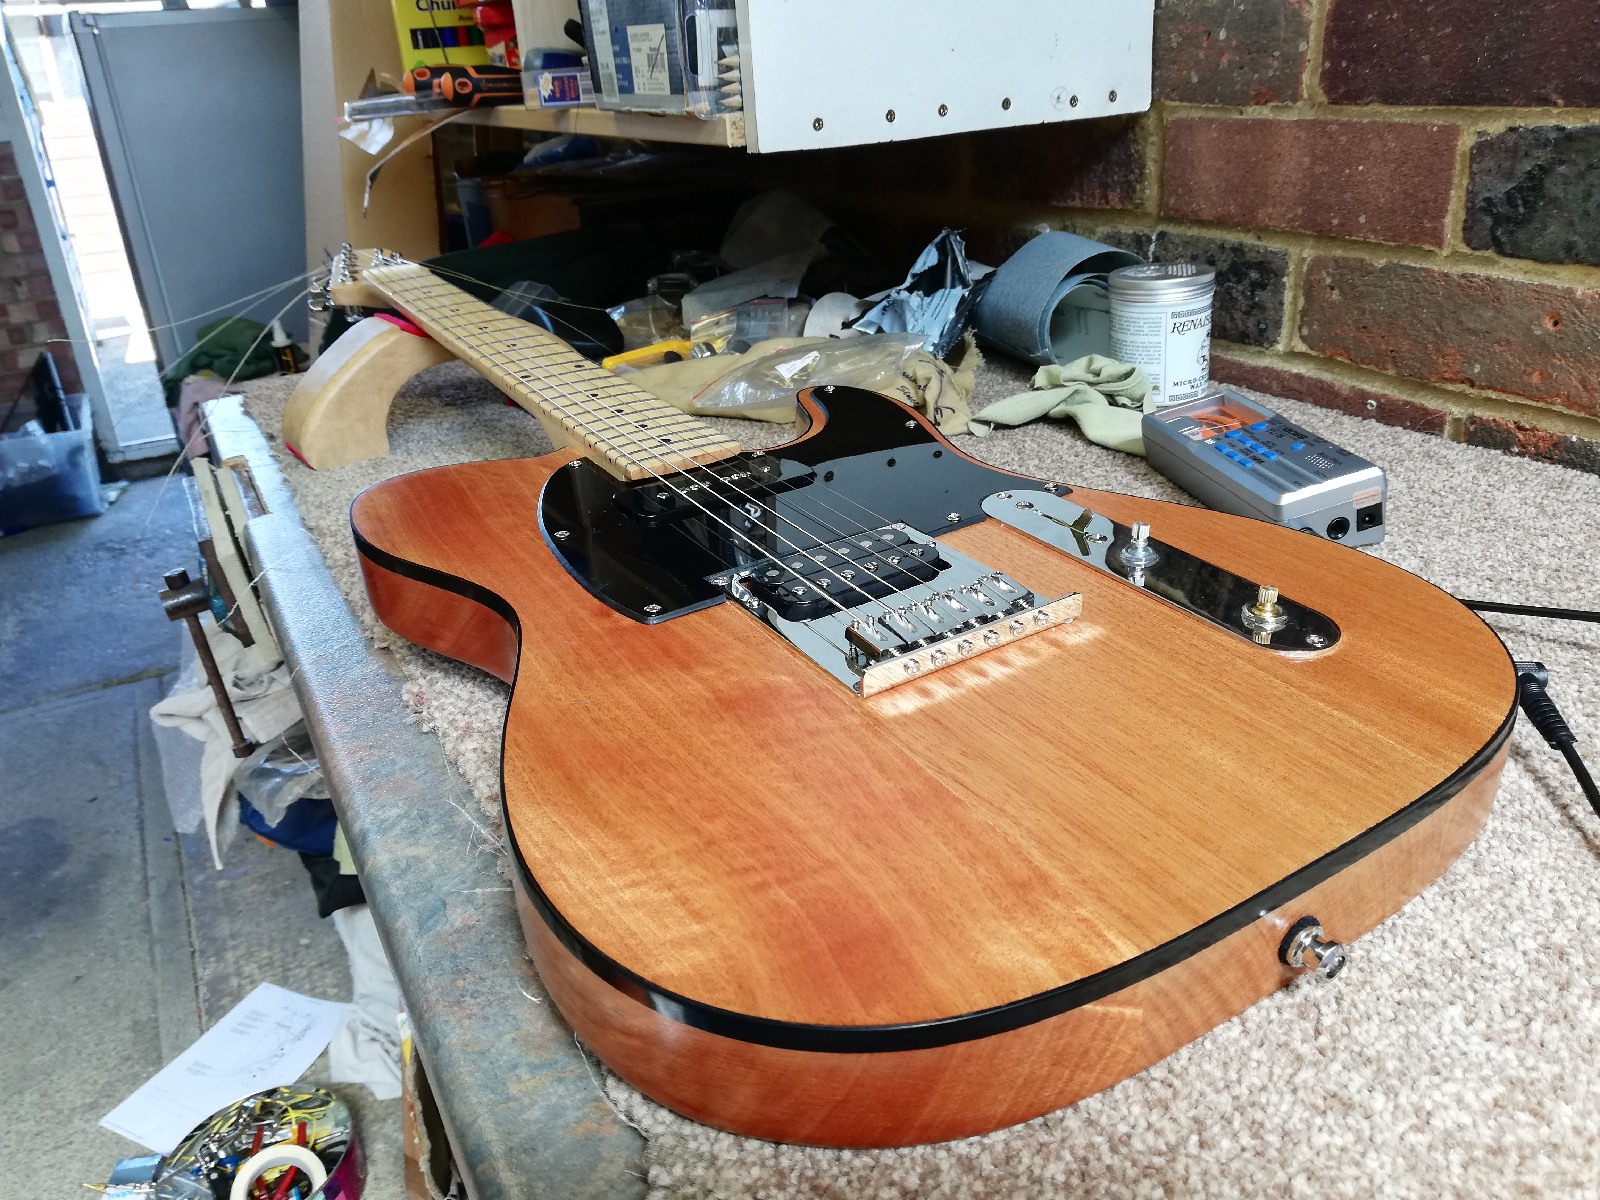
Finally string up and plug in.
Well sort off not surprisingly there's a whole host of set up issues needing addressing, the neck has no relief for a start, nut way too high, bridge way too low. But for another day I've done enough today.


Wow. That is amazing.
ReplyDelete